Deploying Next.js Application to Elastic Beanstalk
— next.js, next js, next, node, node.js, ebs, eb, elastic beanstalk, deploy, environment variables, logging, debugging — 8 min read
Table of Contents
- Setting up the example project
- Create the Elastic Beanstalk Application
- Create the Elastic Beanstalk Environment
- Create the Environment Variables
- Deploying Changes to Elastic Beanstalk
- Setting up a domain name
- Debugging Common Problems
Setting up the example project
Set Up
Clone the repository
git clone git@github.com:j0nah/deploy-example.gitRename the example environment file so it's picked up by Next.js
cd deploy-example/cp example.env .env.localStart the application
npm installnpm run devYou should see something like
% npm run dev
> deploy-example@0.1.0 dev> next devFinally, when you navigate to http://localhost:3000/, you should see:
Hello, from localFile Walkthrough
The three files we're going to look at for this blog post are:
- .env- .env.local- app/page.tsx- app/actions.tsx- .ebignore.env defines environment variables that we plan on checking into source control. Specifically our server side environment variables GREETING will be defined for all environments in .env.
example.env defines the environment variable NEXT_PUBLIC_GREETING_ENVIRONMENT
page.tsx is our index page. It loads the GREETING and NEXT_PUBLIC_GREETING_ENVIRONMENT variables and displays a message on the index page of our application
actions.tsx is a server-side async function that fetches our server-only environment variable, NEXT_PUBLIC_GREETING_ENVIRONMENT, for use on the index page.
.ebignore defines files that won't be packages and uploaded to Elastic Beanstalk. Specifically, I don't want to include the .env.local file in the package we deploy on Elastic Beanstalk.
While bare-bones, these will be enough to demonstrate deploying the application and setting Elastic Beanstalk environment variables.
Create the Elastic Beanstalk Application
Install ebcli
First, you should install the ebcli tool.
Build Production Artifact
Once that's installed, navigate to you the deploy-example directory and get a production build of your application ready for deploy.
cd deploy-example/npm run buildWe want to make sure that a production build was created. We can confirm that by locating the .next folder.
ls -al | grep "\.next"should give us something like
drwxr-xr-x 21 j0nah staff 672 Aug 6 19:59 .nextInitialize the Application
Start with the command eb init. Your mileage may vary, but I typically choose the default option except for the following exceptions:
When it asks to create a new application. For this post, I'll create an environment called deploy-example.
When it asks if I'm using Node.js, I'll choose "Y"
It appears you are using Node.js. Is this correct?(Y/n): YWhen it asks if I'd like to use CodeCommit, I choose "n"
Do you wish to continue with CodeCommit? (Y/n): nWhen it asks to set up SSH, I choose "Y". Note, this is optional and for this post you can also just use the browser-based ec2 SSH environment if you don't feel like setting this up right now.
Do you want to set up SSH for your instances?(Y/n): YCreate the Elastic Beanstalk Environment
If you don't already have an environment set up, we can set up the EB environment using the ebcli tool.
Note, creating this environment will automatically deploy your application, so keep that in mind.
eb createThe following are the options that I chose:
Enter Environment Name(default is deploy-example-dev): deploy-example-prodEnter DNS CNAME prefix(default is deploy-example-prod): deploy-example-prod
Select a load balancer type1) classic2) application3) network(default is 2): 2
Would you like to enable Spot Fleet requests for this environment? (y/N): nExecution of that command will give us a lot of details that will help you understand the status of our deployment. One I want to draw your attention to is the line that gives us the CNAME. Something like
CNAME: deploy-example-prod.us-west-2.elasticbeanstalk.comWhen your application is deployed, you can head to deploy-example-prod.us-west-2.elasticbeanstalk.com to see it in action!
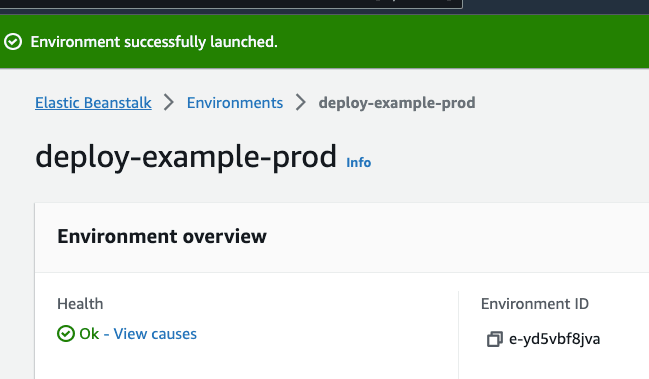
Navigating to your Elastic Beanstalk environment should show all green if everything worked properly:
Bump instance type
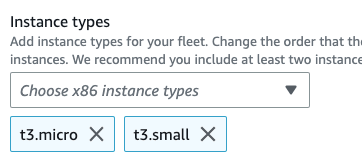
While it is true that this can work with a micro, from experience it seems that this isn't enough memory to consistently run a Next.js application. Even one this tiny. We're going to bump this to a t3.small and I promise it will save you a lot of heartache. We can do this easy from the AWS console.
First, head over to your Elastic Beanstalk environment in the AWS console and click the name of the environment you would like to work with

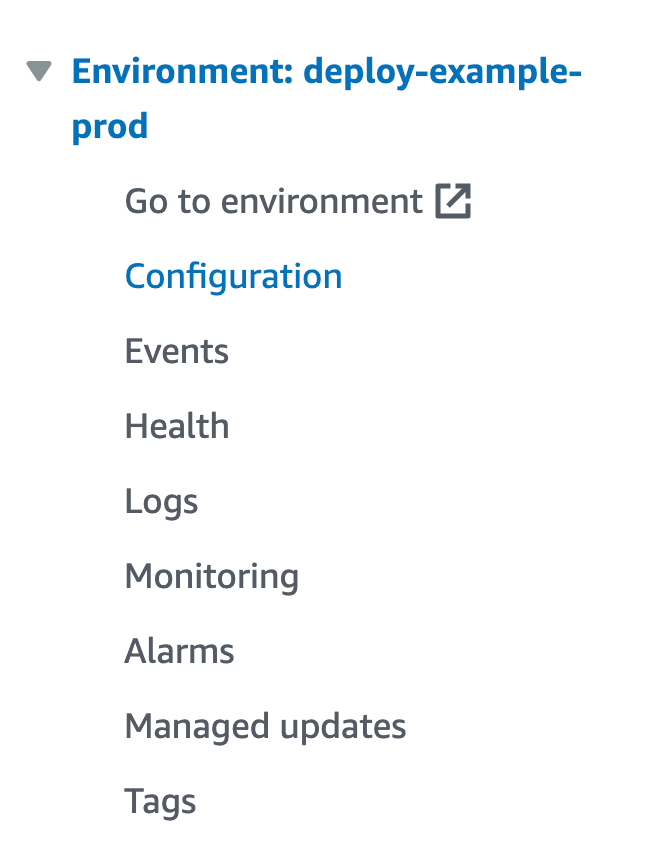
In the left hand panel of the next page, select "Configuration""
Scroll to the "Instance, traffic, and scaling" section and select Edit

Click the "x" next to micro so that only small remains
Scroll down to the bottom of the page and click "Apply". Your application should restart now (it will take some time) on a small rather than micro instance.
Create the Environment Variables
The following is an ascending priority list of how the environment variables are read by Next.js
- process.env
- .env.$(NODE_ENV).local
- .env.local (Not checked when NODE_ENV is test.)
- .env.$(NODE_ENV)
- .env
by precedence here, I mean that a value in .env will overwrite the same variable defined in .env.local or process.env.
Defining environment variables in Elastic Beanstalk
To save you from some googling, note that the variables pre-fixed with NEXT_PUBLIC_ are baked into your production build. This means that they won't change relative to the environment the application is run in. Instead, their values will be frozen based on the environment they are built in. This means, unless we're building on the Elastic Beanstalk environment (we aren't in this post) the only variables we can define are server-side variables, or those without the NEXT_PUBLIC_ prefix.
Defining environment variables is fairly simple through the console.
First, head over to your Elastic Beanstalk environment in the AWS console and click the name of the environment you would like to work with

In the left hand panel of the next page, select "Configuration""

Scroll to the "Updates, monitoring, and logging" section and select Edit
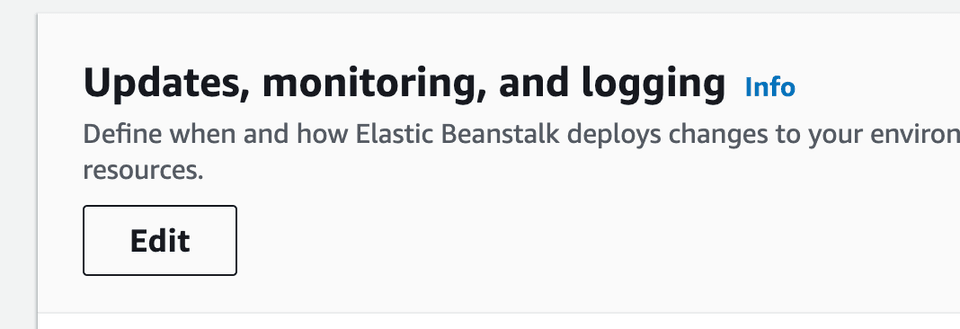
Click "Add environment property"

For testing purposes let's add a "GREETING" as "Haldo"
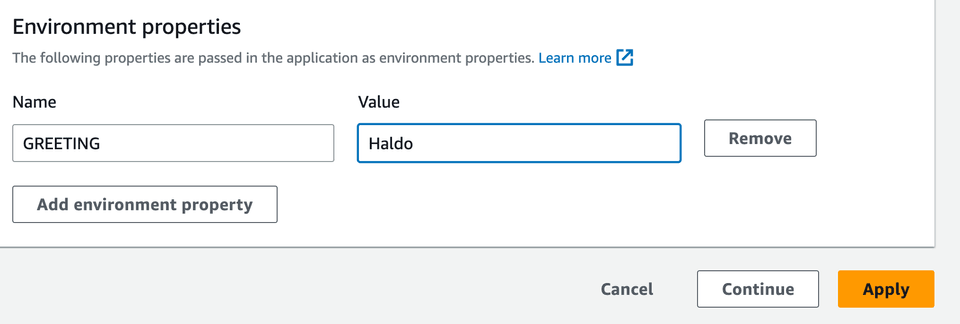
Then just click "Apply" and wait for the app to reboot.
It didn't work!
Hold on, that's weird. When we refreshed the page and we still see "Hello, from local" but based on the code in page.tsx and the environment variable, we should see Haldo, from local. This is because of the priority rulesthe Next.js environment uses for environment variables. Note, we did set the environment variable correctly but it's considered process.env which is lower priority than the .env file. To solve this, let's rename the .env to example.env and re-deploy.
cd deploy-example/mv .env old.enveb deploywhen the deploy is finished, you should be able to navigate back to your site and see: Haldo, from local.
Deploying Changes to Elastic Beanstalk
You probably caught it from the previous section, but if you want to make changes to your application, it's very simple. Let's just update the background color in our application.
Head over to page.tsx and append bg-red-50 to the end of the className. It should now read something like
flex min-h-screen flex-col items-center justify-between p-24 bg-red-50Next, we'll run a production build, package, and deploy our changes.
npm run buildeb deploy
Setting up a domain name
I bought the cheapest domain name I could find on Namecheap. We're going to point into to AWS and then point that at our deployed Elastic Beanstalk application.
Point Nameservers at AWS
After purchasing the domain name, head over to Route 52 on AWS and click "Created hosted zone"

The only setting I'm going to add is the name
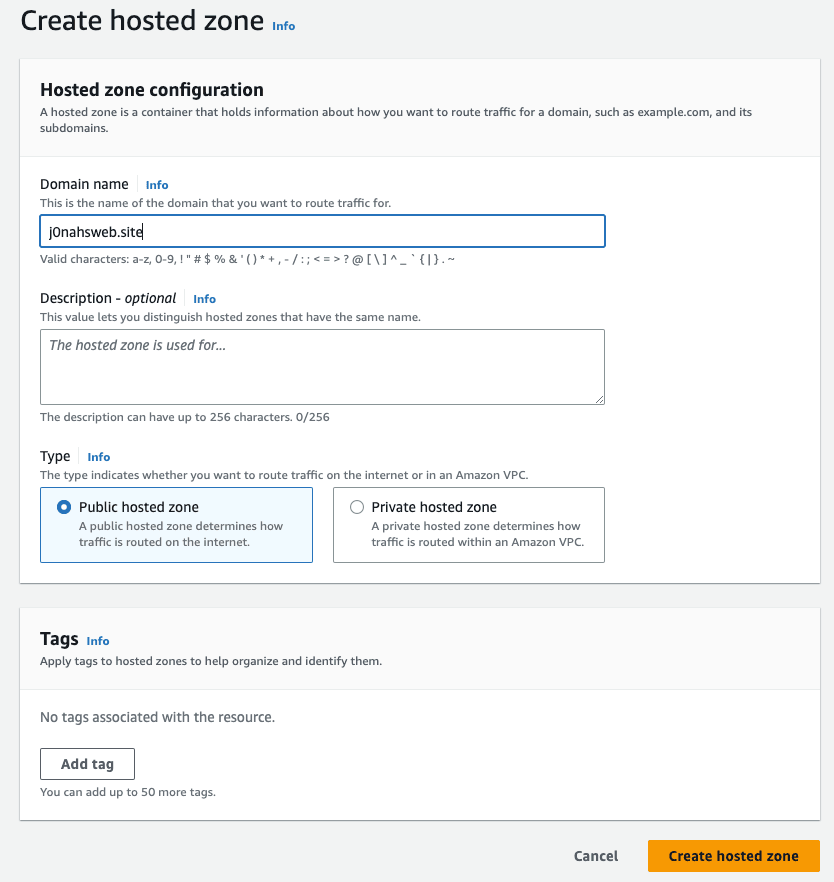
It will bring us to the Route 52 page which has a record with the nameservers we're going to add to Namecheap

We'll set these values on Namecheap

Point Domain at Elastic Beanstalk Application
Back to Route 53, we're going to create an A record to point to the Elastic Beanstalk application. Click "Create Record" and create a new A record. Note how we have the "Alias" option selected and we're routing to a specific Elastic Beanstalk environment:
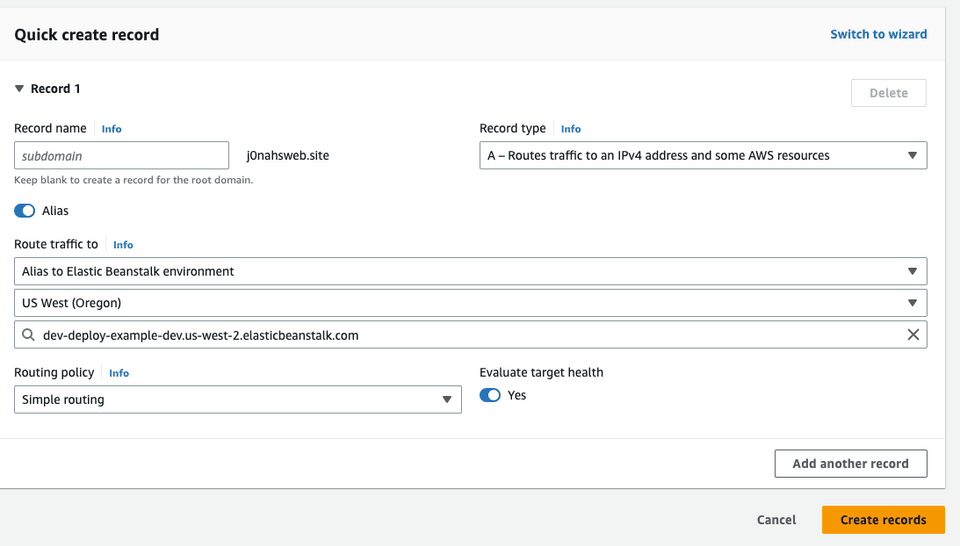
It likely won't work immediately. We need to wait for the DNS to propagate.
Debugging Common Problems
My environment variable isn't working
If you can't seem to get your environment variable to work, check on a couple things:
First, make sure that it's defined properly based on the precedece described above. Remember, if you've got any un-ignored .env file in the package directory, it will replace any values you defined in Elastic Beanstalk.
Second, if you expect it to be available in the browser or client code you MUST define the variable prefixed with NEXT_PUBLIC_.
Applying environment variables failed and put my app in an error state
First, please consider upgrading to a small if you haven't. This can often solve a lot of problems.
Another way I've found to deal with it is just by "rebuilding" the environment from the environment page on the AWS console.
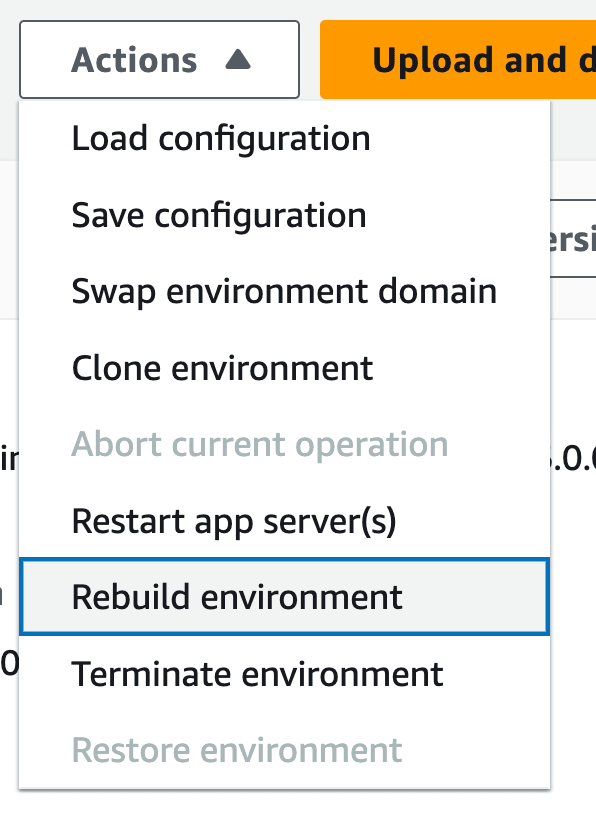
My app just remains in the severe state all time time
First, please consider upgrading to a small if you haven't. This can often solve a lot of problems.
Second, check your logs. If you see something like:
Could not find a valid build in the '.next' directory! Try building your app with 'next build' before starting the server.then you may have forgotten to npm run build before you ran eb deploy.
My question isn't answered
Can't find your error here? Leave it as a comment or email me at contact@j0nah.com and we'll solve it together!